Showing posts with label Tutorial. Show all posts

Thursday, October 22, 2015

Fast Hexies

 Hi I'm Cara from CaraQuilts and I really like hexies and mini charms.
 I've collected a lot of mini charm packs and wanted to be able to see some of my favorite lines so I created these hexie mini quilts.

Requirements

 1 mini charm pack
 2 sheets water soluble paper (I use C&T Publishing's Wash-Away Applique Sheets)
 1 water soluble glue stick
 12x12" fusible batting (I use Pellon)
 12x12" backing
 Coordinating thread for top stitching

To start


We need to cut out 42 1" hexies from the water soluble paper.

Use a dab of glue to place the hexagon paper in the middle of each mini charm square.
Another swipe of glue and fold down the fabric to the paper.


Repeat going all the way around the hexagon.


 Repeat for all 42 from the mini charms.


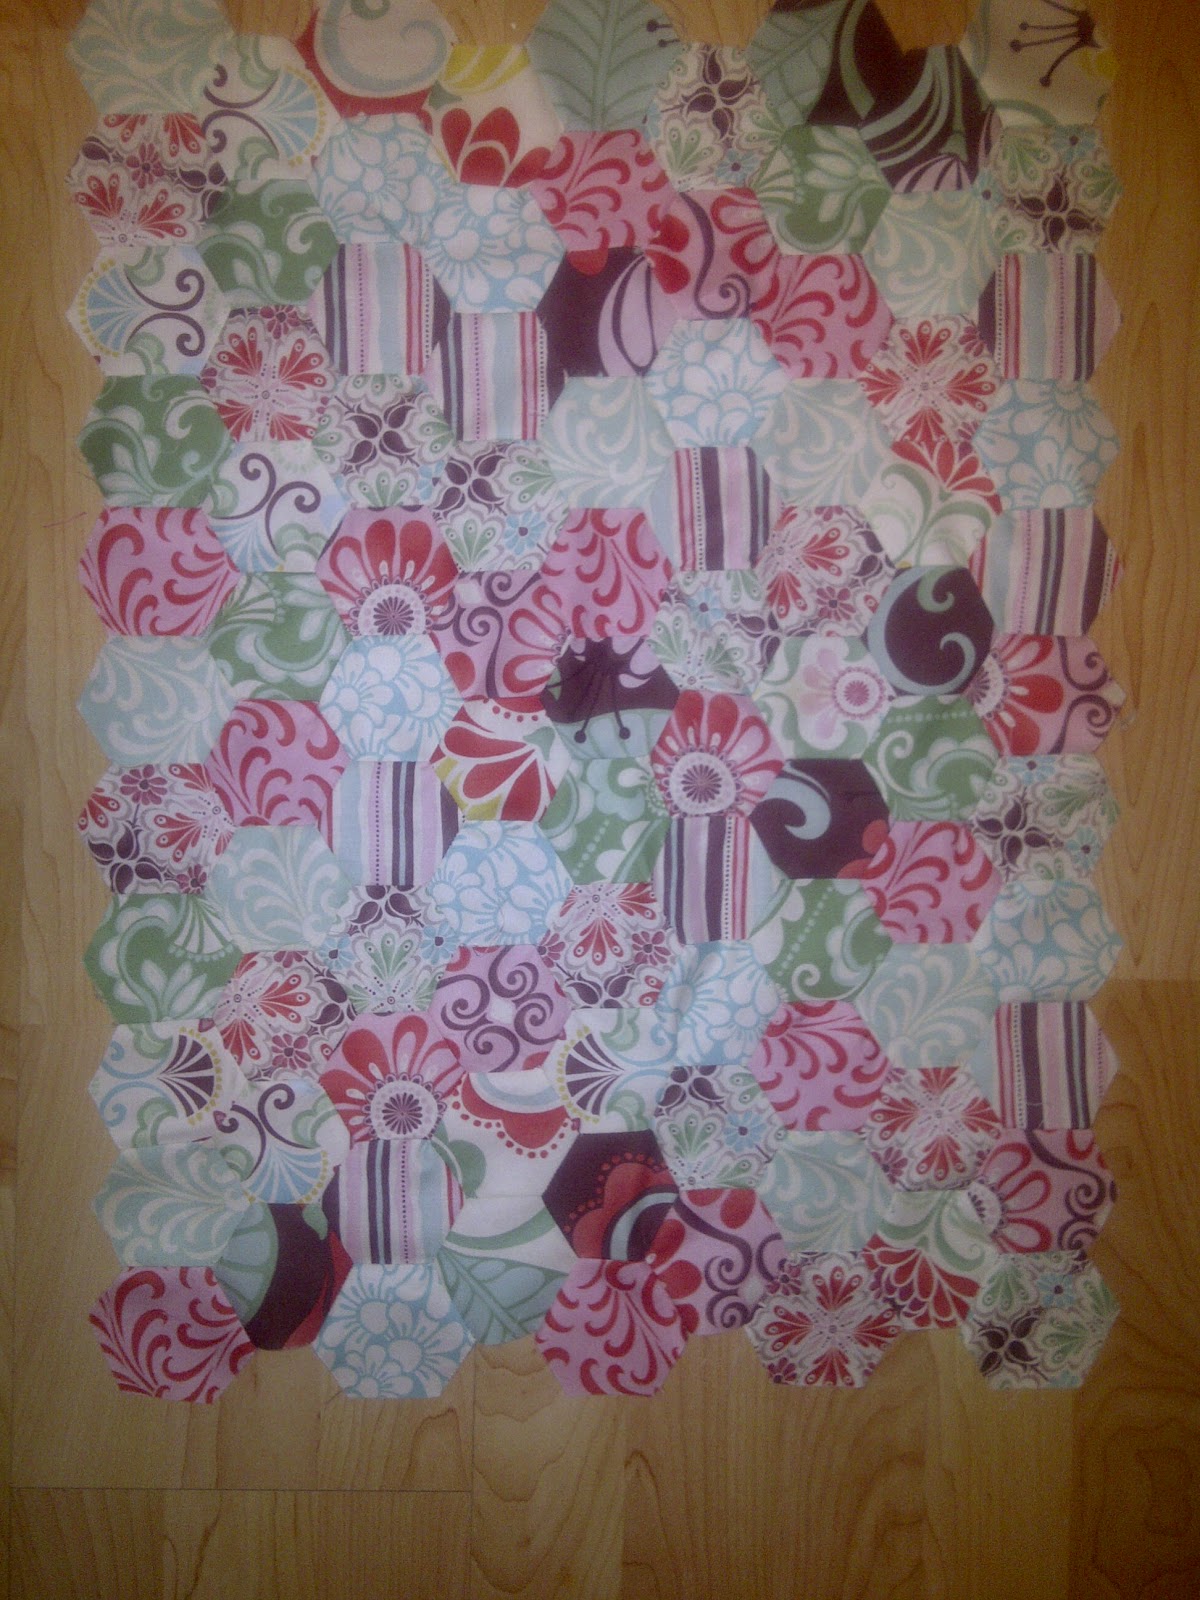
The original one I made I fused each individual hexie. The second time round I stitched them into rows first and I found it easier to fuse them with less risk to my fingers so I suggest first laying out your hexies so you know you like the colour placement etc. and stitching them into 7 rows of 6 using a small zig zag stitch in a coordinating thread.


Lay your first row near to touching the edge and follow the directions for the fusible batting (if using regular batting pin down).  Place the next row right up against the first and fuse. If you have tails from stitching the rows together just tuck them under the row about to be fused.
It's a bit like piecing a puzzle only here forcing the issue is just fine. Continue until you have fused each row.


 Lay the batting and top piece onto your backing and gently press. This normally keeps the quilt sandwich together without needing to pin on such a small piece.
 Using the same thread zig zag the rows together, stopping with the needle down and turning with each point.
 Once your rows are stitched down press the entire piece.

Lay a ruler across the edge of the quilt and trim to a straight edge.


Bind and enjoy!


Tuesday, September 25, 2012

Hexie Bag tutorial

Ok I know it says tutorial but it's more of a quick run down. I'm going to assume you know the basics of making a bag so not explain every step in great detail. I will try to come back and add more later but wanted to get this up for those who had been asking.


  Make a section sewing hexies (I used hexies that were 1.75" across one side) together. 9 rows across, 10/11 down. I used a y-seam to attach the hexies. If you like you can do it english paper piecing and either hand stitch the hexies together or lay then next to each other and just zigzag them together, then pull out the papers. Square it up and measure the final size. Mine was 14 x 18 I think.
The shorter side is the width of the bag.

Cut 2 strips 1.5" x width of the bag. Fold in half lengthwise wrong sides together and press. This the flange, or flippy bit as I call them.

Cut 2 3" x width of bag strips for the top piece.

Lay 1 of the 3" strips right sides together with the hexie section with the flippy bit in between with the raw edge lined up with the top section. Stitch together. Repeat on the other end of the bag. Press.

Measure the entire piece. You need to cut or piece a section the same size for the lining.  I added 3 pockets by sewing a piece of fabric to the lining. Just make sure you put the opening up to the closet edge, otherwise your pocket will be upside down.

Fold each section in half lengthwise and stitch along the sides. On the folded end measure in and up 1-2" and mark both spots. Stitch a line connecting the two spots and cut off the excess triangle. This is to create a bottom for the bag.
Do this to both corners on both the liner and the outer shell sections.

Place the outer shell into the lining so the right sides are facing. Stitch all around the top leaving 2" gap for turning the bag. Turn the bag right side out and push the lining into the outer shell. Press as well as you can. You can add a zipper at this point or just stay stitch 1/8" from the top of the bag.

For straps I used a 3" x 20" piece, sewed it right sides together and turned it right sides out. Press and stitch 1/8" on either side. You can finish the ends either with a French seam or tuck them into the strap itself and stitch across.

Add 1" grommets to either side of the bag about 1-2" from the top. Lace the straps through. You can tie them together, or add something to the ends to keep them from coming out.


All done! Like I said this is more general instructions and I will try to clean it up more later for those not as familiar with bags.

Thursday, August 26, 2010

New Pure Tutorial at Bake Shop!

I have a new tutorial up at Moda Bake Shop! This is my all time favorite project for it's usefulness. I've had to fend off a cousin and an aunt from stealing it this week! lol
 I'm not at home, we've been basking in the fabulousness of Muskoka, so I'm afraid you're going to have to hit the link to see! And please let me know if you like it!

This line is so gorgeous I feel so lucky to have been able to create something with it.
I can't wait to get home and show you all some fabulous pictures, of quilts, nature, and one awesome wedding!

'Til Sunday or Monday!

Wednesday, March 24, 2010

Mini Verna and star sashing

 So ever since I started showing Mini Verna I've had a few questions on her. I was inspired after making a table runner in a similar style using Happy Zombie's pattern.

Below are instructions, or the math anyways, for using Mini Charms (2.5"), and using 3 charm packs (5") to make a large throw size.

Quick notes. Regardless of the size of the pieces the method is the same.
When sewing the rows together always press towards the square, this will make joining the rows together a snap.
Working with smaller pieces take more time then larger ones I find. Mostly because you don't have the room for error and they can be hard to line up as nicely. Paper piecing would be easier but since I don't EQ without the laptop I can't give you a template. I did make Mini Verna without it so it's doable.
These pictures were using mini charm sizes, so it's ok that they look smooshed. It works.
One sided sashing is this:
One sided sashing goes towards the edge of the quilt.

Two sided is this:

Mini Verna
5*8 setting
Cutting:
40 -mini charms, 2.5" squares.
67 -1.25x2.50, this is the sashing.
252- 1.25" squares, these are the stars points and star centers.

I used the stitch and flip method (if you need this explained email me or check out some of the tutorials online) to make 45 two sided sashing pieces, and the 22 one sided sashing pieces.
Arrange the charms in whatever way is pleasing to you. Sew the sashing and charms together. Sew sashing and star centers together into rows and then sew the rows together alternating Charm and Sashing rows.
I added a 1" border all around in the same fabric as the sashing. Baste, quilt, and bind!

Alternate Sizes/Setting

Mini Charms 6x7 setting
42 mini charms (2.5")
47 sashing pieces (2.25"x1.25")
   - 22 one sided sashing
   - 25 two sided sashing
177 1.25" squares
   -144 corner pieces for stitch and flip
   - 30 centers

2 Charm Packs 9x9 setting, 54"x54"  with no borders added.
81 Charm Squares (5"), all but 3 charms from 2-42 piece charm packs.
74 sashing pieces (2.5x5) [Use Jelly Roll strips for a scrappy sashing, in which case you'd need 10 strips, or 1yd of fabric]
    - 32 one sided sashing
    - 42 two sided sashing
296 2.50" squares (One of the Jelly Roll Basics would be a time saver, you'd need 18.5 strips, or 1.325 yards)
    - 232 for the corners of stitch and flip
    -64centers

3 Charm Packs 11x11 setting 64"x64" with no borders added.
121 Charm Squares (5"), all but 5 charms from 3-42 piece charm packs.
130 sashing pieces (2.5x5) [Use Jelly Roll strips for a scrappy sashing, in which case you'd need 17 strips, or 1yd of fabric]
    - 40 one sided sashing
    - 90 two sided sashing
540  2.50" squares (One of the Jelly Roll Basics would be a huge time saver, you'll need 34 strips, or 2.5yds of fabric)
    - 440 for the corners of stitch and flip
    -100 centers


I hope this helps...I know it may not be the most clear so feel free to e-mail me any questions or comment here.